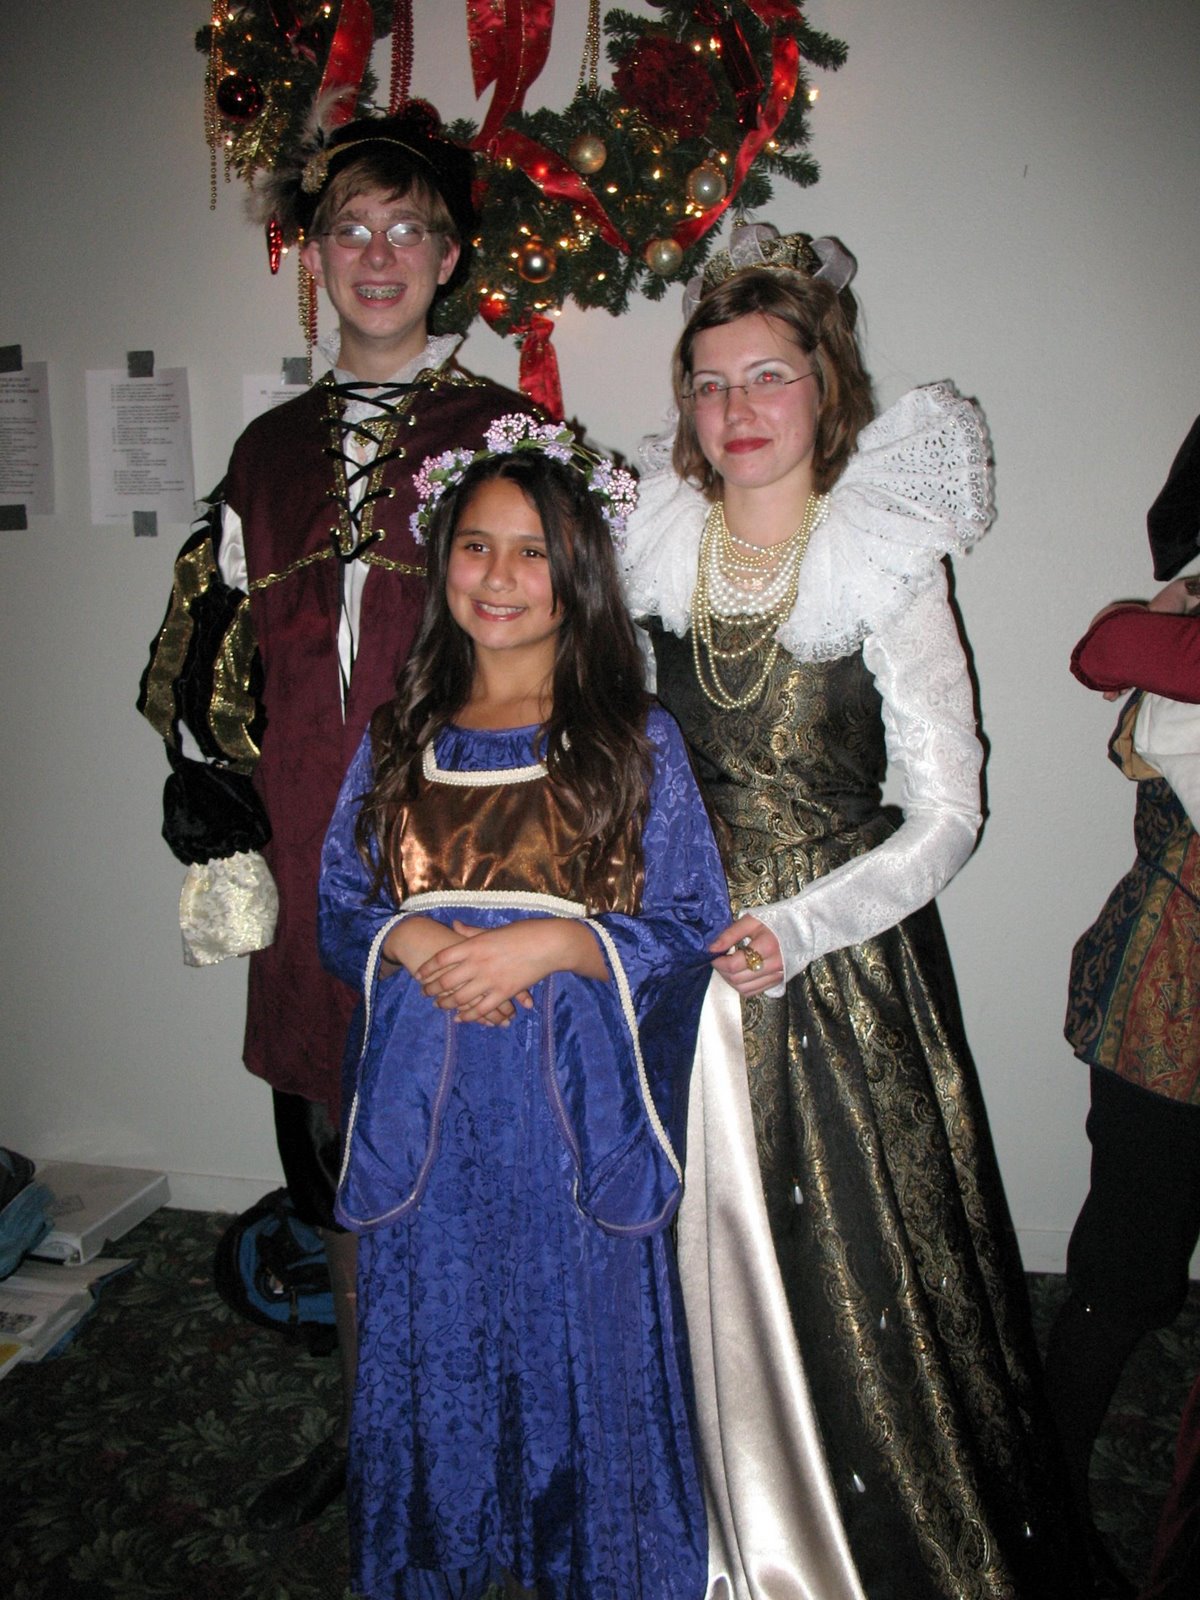
Several years ago when Frania was a sophomore I created a Madrigal Dinner dress for her from Simplicity pattern 4488. Of course the next year she wanted another one, but the dress was a huge amount of work and fairly expensive, so I resisted. This year, Mr. B. added a visit from Queen Elizabeth I into the Madrigal Dinner and assigned her the role.
"Queen Elizabeth's dress has to be the fanciest dress on the floor" said he.
Well I knew I could make a nice dress, although not necessarily the fanciest dress on the floor. So, I went to the internet and began looking for info on what the Queen wore. I learned that at the time of her death she had over 2000 dresses. This gave me more confidence, who is to say that one of her dresses didn't look like the one I was about to create? There was also a lot of talk about the Queen wearing purple, but I looked at all the pictures I could find, and it didn't appear that any of the dresses were purple, although I now know that out of 2000 dresses some probably were purple.
I found this excellent sites on the internet for creating period clothing http://www.elizabethancostume.net/
I followed the link to http://www.reddawn.net/costume/costume.htm and decided to make Simplicity 3782 view A. I buzzed down to Joanne Fabrics. Now that the Hancock Fabrics has closed, this is the only fabric store in town, which is downright annoying.
I bought the pattern and walked through the store, trying to find material I thought would work. I only saw one possibility, which was 44/45 inches wide. Note that the pattern calls for 60 inch wide material for the dress. Got my daughter to shop with me a few days later, and after much hemming and hawing and advice from a mutual acquaintance we ran into, we picked out the material. We got 5.8 yds of a 45" brocade ($41). This is all that was left on the bolt, and it turned out to be plenty of material. We got 1 yd of ivory bridal jacquard for the sleeves ($10). We didn't line the sleeves. We got 1.5 yards of satin, also 45" wide ($7). We got 0.5 yd heavy canvas for the bodice lining (duck cloth $3.50). Luckily I didn't see I was supposed to buy felt for the underskirt front panel backing so I didn't get that. I bought lots of muslin for the rest of the underskirt (7 yds for $15).
I had less than 2 weeks to create this dress. We looked at ribbon and lace to make the dress as shown on the pattern, but couldn't find anything we liked in the rather meager selection at Joanne's so didn't get anything. Well we did get something but I ultimately decided not to use it because I didn't think it was suitable. Plus, I really couldn't see how that front lace was going to enhance the dress. Perhaps if I could have actually looked at their dress instead of the low resolution image on the pattern front....
The 44/45" wide material works fine. I just cheated in the edges at the bottom of the skirt a bit, which is really ridiculously full.
I thought the pattern was a little short on the type of directions which are needed to make a really nicely finished garment.
The first thing I did was to wash everything and hang it to dry on my line, per instructions from http://www.vertetsable.com (I think I read that here). Everything was fine except the canvas wrinkled like crazy and I had to iron and iron to get it almost smooth. Not sure what will happen if I have to wash the dress, will the brocade tolerate the high temp needed to iron if the canvas wrinkles like that again? So got some underarm shields for the Queen to wear in the finished garment.
When I made Simplicity 4488 the bodice turned out to be too small and I actually cut it apart at the sides and inserted a panel in each side to make it fit, so this time I first made up the bodice in muslin like you are supposed to. Good thing too, as it was too small. And it was too small around the waist more than it was too small at the shoulders, so I couldn't just make the back panel an inch wider on each side. I wanted the edge of the back panels to be parallel to the grain of the fabric, so I fiddled around adding extra inches to the side seams of the front and the back until I got someth
 ing that seemed to fit when she tried on the bodice.
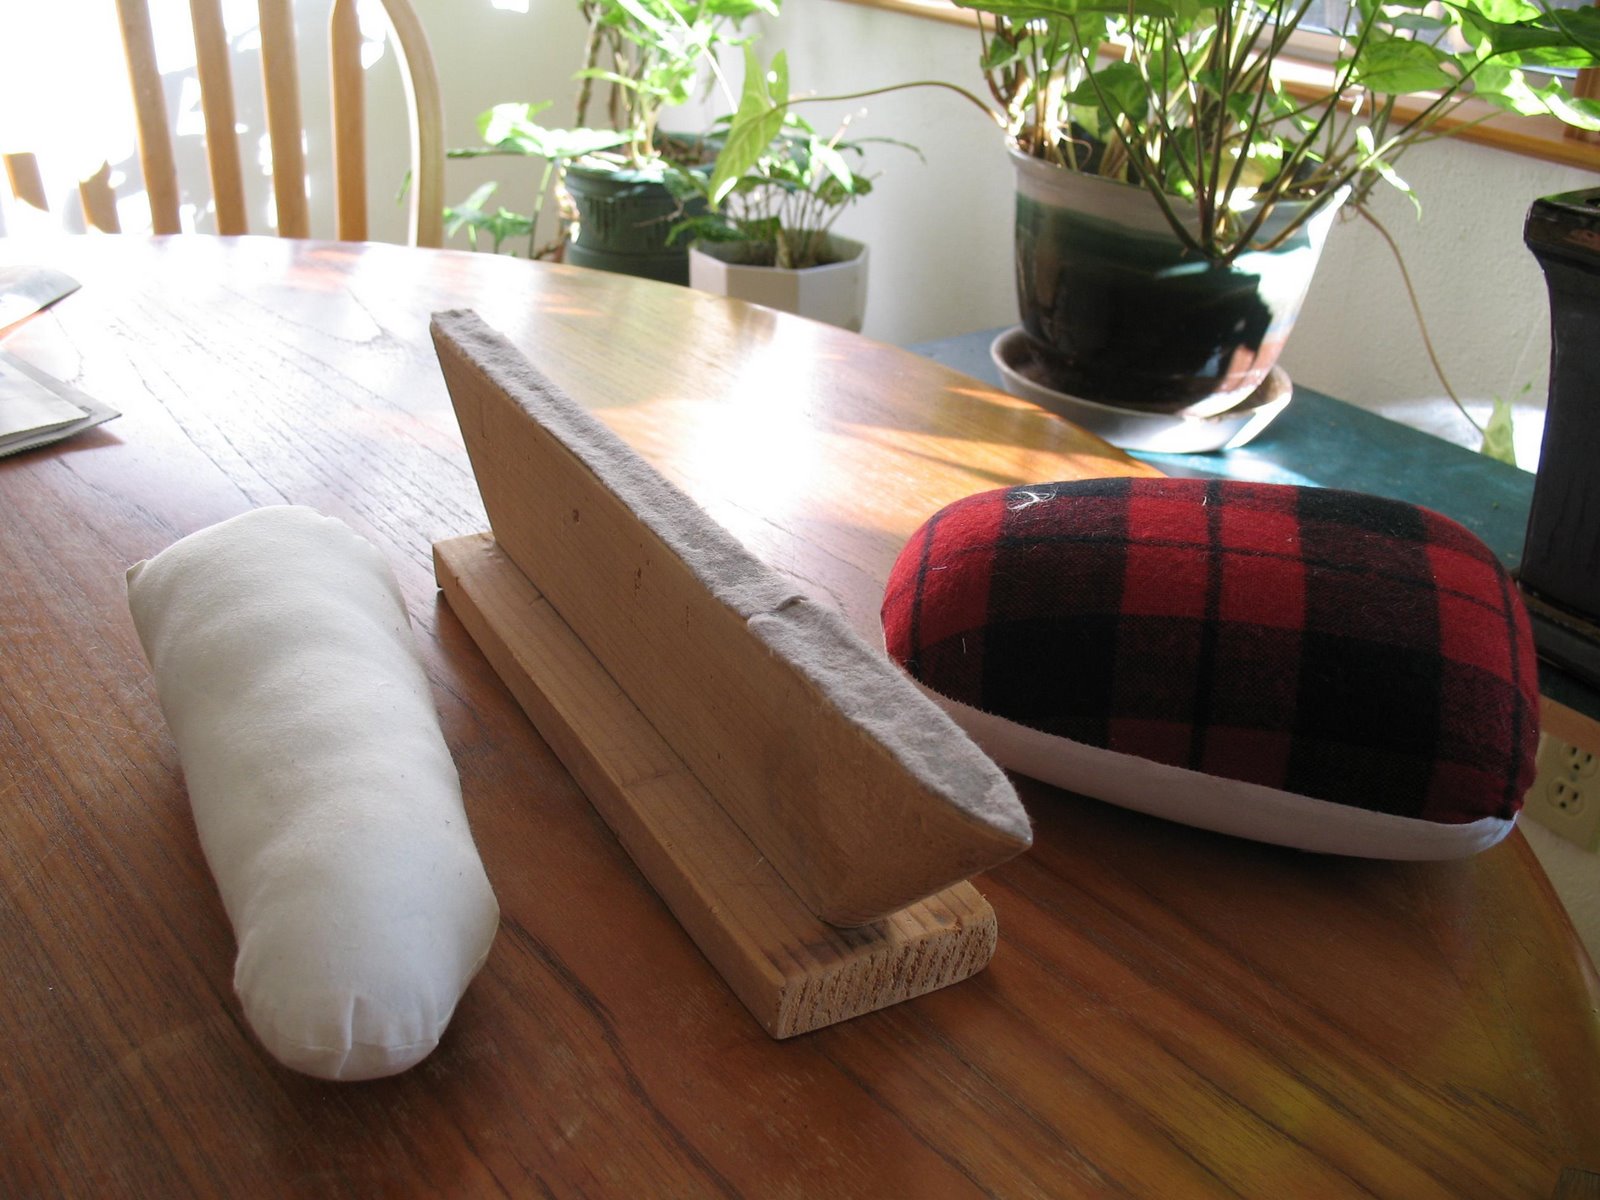
The next step was to make the bodice up in our fabric. Luckily while laying awake at night I realized I needed to plan how the front of the bodice lined up with the pattern on the fabric. The picture shows how it turned out. I'm really happy about that part, especially because I forgot about lining up the pattern for the back panels but got lucky as the pattern is beautifully placed on the back panels. I decided to line the bodice with leftover material from the brown madrigal dress, but what to do about the canvas interfacing? The directions weren't much help, I thought the seams would be much too bulky if I included the canvas in the seam allowances, which is what the directions said to do, so finally I decided to treat the canvas as if it were a fusible interfacing. I tailor basted the canvas to the lining, and then carefully trimmed off material around all but the bottom edge, so that the canvas was not included in the seams, except the seam that would fasten the bodice to the skirt. Then I followed the directions in the pattern, pressing open all seams before folding them and pressing them closed. For this I used my ham and other pressing tools.
 Then I had Frania put in the grommets 'cause she did such a nice job on her brown dress, but I was most unhappy when I saw how it turned out, because to avoid thickness at the back seam, she had actually put them in about an inch from the opening.
The grommets are rough in the back, and we found out from her brown dress that they snag the ribbon lacing and the fabric of the blouse. For her brown dress I finally sewed material to cover the rough backside of the grommets. For the new dress I borrowed a file from my husband and we filed down most of the rough edges. This seemed to help quite a bit.
I had her try on the bodice, and now it seemed to be too big, so it was a good thing she had put the grommets where she did. I folded under the edge of each back to make it smaller and sewed on the skirt and then had her try it on again, and this time it was too small around the waist, so I picked the seam apart at each side of the back closure, unfolded the bodice, and resewed the seam. The moral being that it's really hard to tell how that bodice is going to fit until you have the weight of the skirt sewn on and it sits in its proper place on the body. The bodice is still a bit too big, so the lacing has to be tight. I sewed the underflap to the skirt opening instead of to the bodice opening.

About sewing on the skirt: The directions say to use strong thread and run a gathering line. My sewing machine really hated the heavy thread, and it was hard to draw in the gathers, so I ended up sewing the gathering line by hand. This worked out so well that I think in future I will do all gathering lines by hand sewing.
The gathered skirt edge was really, really thick. I thought about the write-up I had seen on cartridge pleats, but I wasn't really sure how to attach the cartridge pleated skirt to the bodice, so in the end I just pinned everything together, forced all that thickness under the pressure foot and sewed it all up. The directions did not tell me to clip the seam, but since it is curved it seems like you have to. The seam is really stiff, and the front point of the bodice wants to stick out. I'm not happy with this part of the dress construction, I'm sure it's not right, but I'm not sure how to fix it. I clipped the canvas as close to the seam as possible, which was not that close since I had previously sewn the bottom edge of the bodice together. My seam just floats, I did not tack the seam binding I sewed onto the seam edge to the bodice lining.
This is where I had another of my disappointments with the dress, which shows how rusty I am at sewing. When I laid out the front sk
 irt panels, I should have made sure that the fabric pattern was exactly aligned on the top and bottom pieces of fabric. I forgot to do this, and so the pattern on the front panels is slightly offset from top to bottom on the two sides of the skirt. In other words, they are not perfect mirror images of each other the way they should be. Also, when I sewed the bodice to the skirt I didn't have everything perfect, so one side of the skirt lays nicely from the bodice point and for some reason the other side does not, I think the one front panel is sewn in at a slight angle relative to how it should be, which tends to make a slight hump instead of a nice graceful line. Both the pattern offset and the hump are visible in the detail.
The last problem was that having changed the bodice so much meant that the armhole size and shape was different from the pattern. I had Frania try on the dress, pinned the arm straps to what I thought was the right size, and sewed up the sleeves using 3/8 inch seam allowances up at the top edges of the sleeve, to make the sleeves slightly larger to match (sort of) the larger armholes. Then I hand sewed the gathering line and using the pattern as a guide as to where approximately the gathers should sit in the sleeve hole, I pinned the sleeve in place and sewed it.
By this time I was heartily sick of working on this dress. And I still had the underskirt to make. Frania was responsible for figuring out the ruff and crown, which I think she did a great job on, finding a crown pattern on the internet, and fashioning the ruff with lace and wire (although I sewed it to the neckband). She used fishing line looped around the crown to hold the ruff up. This worked fine except that during the performance the crown slowly slid toward the back of her head.
I had thought about making a Spanish Farthingale, but couldn't quite stomach the further effort required, so in the end, following advice on the internet, we bought some stiff tubing at OSH and stuck it in the hem of the underskirt. At first it turned around like a mobius strip, but eventually relaxed enough. Not real elegant, but it did hold the skirt out nicely.
Frania was also responsible for coming up with the trim for the skirt. As luck would have it, there was only 1 package of pearl drops left at Michael's, so there aren't as many "jewels" on the gown as we would have liked. Also we never did pick out any other trim, and so although I think the dress would have benefited from some additional trim, it is what it is. The Madrigal dinners are over now, so the dress will be retired to the closet. I might be inspired to add trim to it if she's ever going to wear it again, but I think it worked well enough.

